Settings summary for POP3/IMAP Mailboxes – Full detail below
Our standard and premium mailboxes can be loaded onto your device or through your mail client either with a POP3 connection or an IMAP connection.
By using an IMAP connection, you can have multiple clients simultaneously connected to the same mailbox. For example, you can have email on your phone, your tablet, and your computer, and when you delete a message from your phone, it will also be deleted on your other devices, for this reason we recommend using IMAP over POP3.
The way your device or mail client is designed may be different than how other programs or devices work, with different names for the same steps.
Your device or program should have detailed information on how to add and set up mailboxes onto the system, but there are general pieces of information you need to complete the process.
When selecting the account type, select IMAP.
Your User Name is your full email address.
Your Password is your mailbox password.
If you use IMAP:
User Name: bob@thisismydomain.com
Password: password123
Outgoing Mail Server: mta.extendcp.co.uk
Outgoing Mail Server Port: 587
Outgoing Mail Server SSL: STARTTLS
Outgoing Authentication Type: Password
Incoming IMAP Server: imap.extendcp.co.uk
Incoming IMAP Server Port: 993
Incoming IMAP SSL: SSL/TLS
Incoming IMAP Authentication Type: Password
If you use POP3:
User Name: bob@thisismydomain.com
Password: password123
Outgoing Mail Server: mta.extendcp.co.uk
Outgoing Mail Server Port: 587
Outgoing Mail Server SSL: STARTTLS
Outgoing Authentication Type: Password
Incoming POP3 Server: pop3.extendcp.co.uk
Incoming POP3 Server Port: 995
Incoming POP3 SSL: SSL/TLS
Incoming POP3 Authentication Type: Password
Other useful pages:
I can receive mail but it won’t send e-mails out – Says error 550 – Authentication
Full Detail of how to configure:
Setting up a Sturgessnet mailbox, standard or premium, is just a case of adding the right details to Outlook 2011.
The details that Outlook uses are the same as any other mail client, but you might need to look in different places to find them.
This guide will show you the settings you need to use, along with the places you need to add them.
First of all, regardless of what type of mailbox you’re setting up, you’ll need to open Outlook‘s account settings then select Tools and “Accounts”
If you’ve not yet set up any accounts on Outlook at all, you’ll see the following screen:
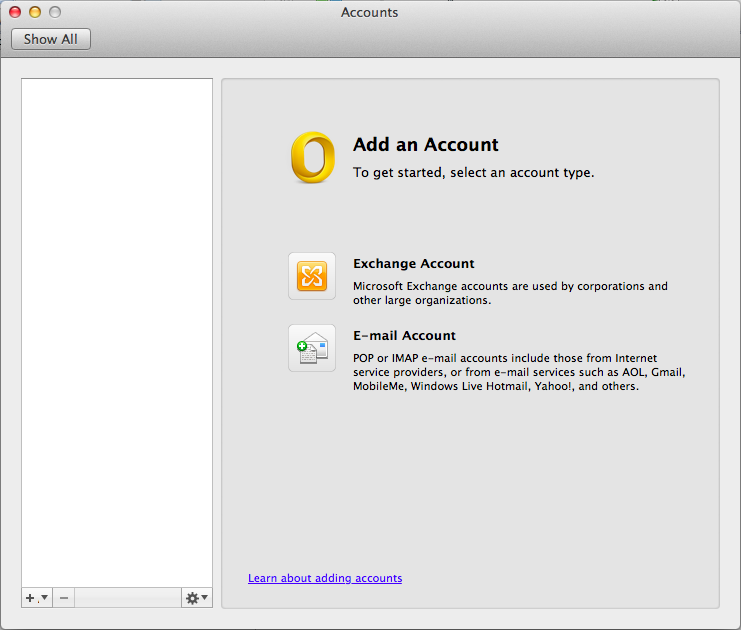
Just select the mailbox type you’re setting up. For standard and premium mailboxes, click “E-mail Account”.
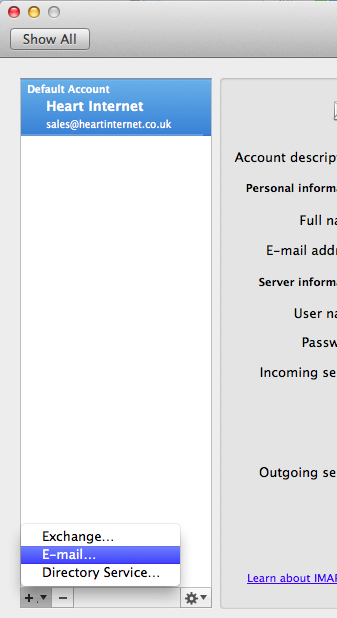
If you’ve already set up another e-mail account in Outlook, the above screen won’t appear, and you’ll instead see one like that pictured below.
The same options are available to create a new mailbox by clicking “+” button and selecting the mailbox type — E-mail:
Standard and Premium Mailboxes
As you’re setting up a standard or premium mailbox, you’ll need to have clicked ‘E-mail’, rather than ‘Exchange’.
You should now see the following:
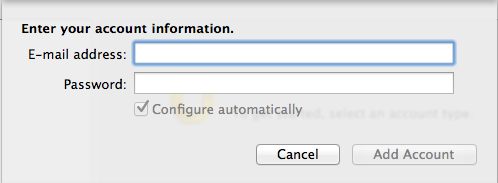
Add your e-mail address and password to this page and then untick the ‘Configure automatically’ box.
This will open up some additional options:
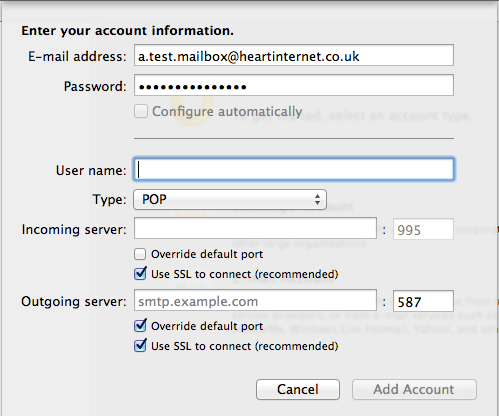
The username field should be set to your full e-mail address.
The ‘Type’ field refers to the protocol used to retrieve (not send) your mail.
Our standard and premium mailboxes are as-is, and can be connected to using either the POP or IMAP protocols.
Essentially, using POP downloads mail to your computer from the server, meaning you have a local copy that is separate to the copy on the server(which is preserved by default in Outlook 2011, but removed in some other clients).
Conversely, IMAP leaves the messages on the server, and allows you to view and manage them remotely. If you choose IMAP, any changes you make in Outlook will affect the mail in the mailbox on our server.
Both the incoming and outgoing server fields should be set as follows (providing you’re using our nameservers and haven’t made any changes from the default DNS records):
mail.yourdomainname.com
For the outgoing server, click ‘Override default port’ and set the port number to 587. Port 25 can be used, but is not recommended, as some ISPs now block this port.
Both ‘Use SSL to connect’ boxes should not be ticked.
Once you’ve added this information, just click ‘Add Account’.
Having done this, you’ll now see the account has been created, and the account settings will be displayed. You still need to make one additional change to ensure you can send mail.
On the screen you now see, click the ‘More Options’ box beneath the ‘Outgoing Server’ heading:
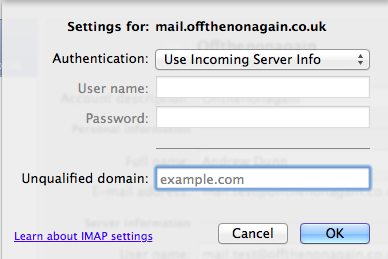
This will load a set of options from which you can select ‘Use Incoming Server Info’ from the ‘Authentication’ box.
Once you’ve selected this, click ‘OK’ and close the preferences.
You’re all done!